
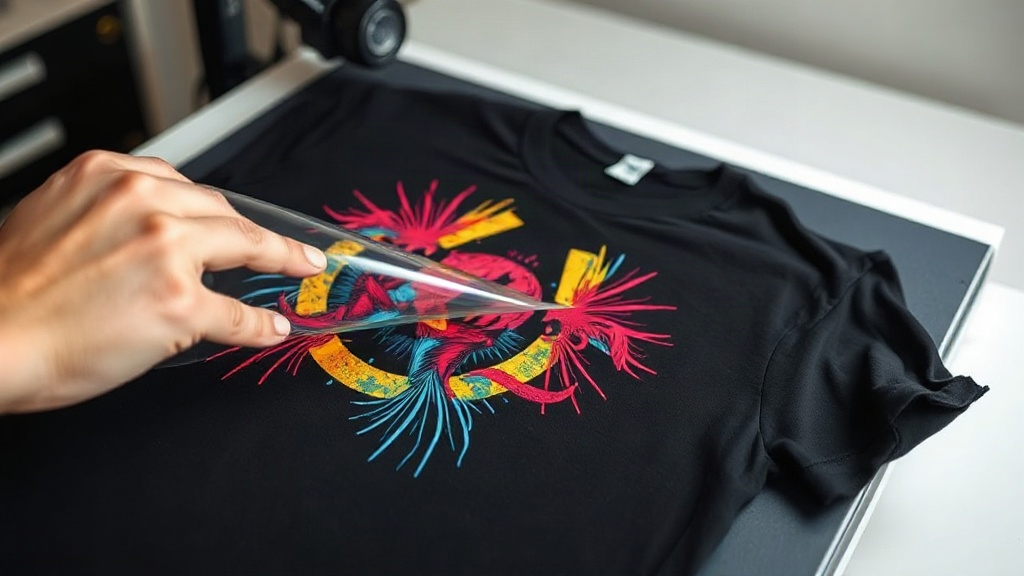
When you first hear about DTF Transfers, you might picture a complicated industrial process. But the truth is simpler and more exciting: it's a digital printing method that lets you transfer full-color designs onto almost any fabric, from cotton and polyester to blends and even treated nylon. Unlike vinyl or screen printing, DTF doesn't require weeding, doesn't need special pretreatments for most fabrics, and works beautifully on dark and light garments alike. In this guide, we'll walk through what DTF transfers are, how they're made, how to choose the right supplies, and the pro tips that separate a print that cracks after one wash from one that survives dozens.
What Exactly Are DTF Transfers?
DTF stands for Direct to Film. The process involves printing your design onto a special PET film using a DTF printer loaded with water-based pigment inks. While the ink is still wet, a fine thermoplastic powder (often called hot melt adhesive powder) is applied evenly across the printed area. The film then goes through a curing oven or heat press to melt the powder, creating a flexible, adhesive layer. The result is a transfer sheet that you can store and later apply to a garment with a heat press. The magic is in that powder: when heated again during application, it bonds with the fabric fibers, locking the ink in place.
Unlike DTG (direct to garment), which prints directly onto the shirt and often requires pretreatment, DTF transfers are printed separately and can be applied to a much wider range of materials. They also allow for higher detail and brighter colors on dark fabrics without a white underbase. For small businesses and crafters, this means you can produce custom apparel on demand without investing in multiple screen setups or dealing with messy liquid adhesives.
The DTF Transfer Process Step by Step
Understanding each stage helps you troubleshoot when things go wrong. Here's the typical workflow from digital file to finished garment.
1. Design Preparation
Start with a high-resolution image, ideally 300 DPI at the final print size. DTF printers use CMYK plus white ink, so your design should be in RGB or CMYK mode, but avoid spot colors unless your RIP software handles them. Mirror the image horizontally because the transfer will be flipped when pressed. Also, add a white underbase if you want the colors to pop on dark garments; most RIP software does this automatically, but you can control the choke and spread to prevent white edges.
2. Printing
Load the PET film into your DTF printer. The printer lays down a layer of white ink first (if your design requires it), followed by CMYK. Some printers print white last, but the standard is white first for opacity. The wet ink sits on the film, waiting for powder. Humidity and temperature in your workspace affect ink behavior, so keep the room between 68-75°F (20-24°C) and 40-60% relative humidity for consistent results.
3. Powder Application
While the ink is still wet, sprinkle the hot melt powder evenly over the printed area. You can do this manually with a scoop or use an automatic powder shaker. Gently tilt the film to let excess powder fall off, then tap the back to remove any clumps. The goal is a thin, uniform layer that sticks only to the ink. Too much powder and the transfer feels stiff; too little and it won't adhere properly.
4. Curing
Curing melts the powder into a smooth, gel-like layer. You can use a heat press at 320°F (160°C) for 2-3 minutes with low pressure, or a conveyor oven. The film should be placed on a heat-resistant surface. After curing, the transfer is ready to use or store. Proper curing is crucial: undercured transfers peel off in the wash, while overcured ones become brittle. Invest in a temperature gun or use a heat press with accurate digital controls.
5. Application to Garment
When you're ready to apply, preheat your heat press to 320-350°F (160-177°C). Place the garment on the platen, position the transfer with the powder side down (the design should read correctly, not mirrored), and press for 15-20 seconds with medium pressure. For best results, use a Teflon sheet or parchment paper over the transfer. After pressing, wait for the film to cool completely before peeling. Cold peel gives sharper edges and better durability. If you peel while hot, the design may stretch or leave residue.
Choosing the Right DTF Supplies
Not all films and powders are created equal. Your choice directly impacts print quality, feel, and washability.
PET Film
Look for double-sided matte PET film. It should be coated to accept ink without repelling it and release the transfer cleanly after pressing. Cheaper films may cause ink smearing or powder sticking to the back. Brands like DTF Station or InkOwl offer reliable options. Film thickness is usually 75-100 microns; thinner films feel softer on the garment but can be trickier to handle.
Hot Melt Powder
There are two main types: TPU (thermoplastic polyurethane) and PA (polyamide). TPU is more elastic and works well for stretchy fabrics; PA is softer but less stretchy. Particle size matters: finer powders (80-170 microns) give a smoother finish, while coarser ones are more forgiving. Store powder in an airtight container to prevent moisture absorption, which causes clumping.
Inks
Use DTF-specific pigment inks, not regular DTG or sublimation inks. They are formulated to work with the powder and to stretch without cracking. Keep your printer's ink system clean; clogged nozzles lead to banding. Run a nozzle check daily and clean the printhead as needed.
Common DTF Problems and How to Fix Them
Even with good supplies, issues can arise. Here are solutions to frequent headaches.
- Transfer peels off after washing: Likely undercured or insufficient pressure during application. Increase curing time or pressure, and ensure the powder is fully melted.
- Cracking in the print: Overcured transfer or too much powder. Reduce curing temperature/time and use less powder. Also, stretch the garment before pressing to allow the transfer to flex.
- White edges around design: The white underbase is larger than the color layer. Adjust the choke in your RIP software to pull the white in by 1-2 pixels.
- Powder not sticking: Ink too dry or film not compatible. Print in a humid environment and use quality film.
- Dull colors on dark shirts: Not enough white ink or white layer too thin. Increase white ink density or print two white layers.
DTF vs Other Printing Methods
How does DTF stack up against screen printing, DTG, and sublimation? Screen printing is cost-effective for large orders but requires setup per color and doesn't handle gradients well. DTG is great for cotton but struggles on polyester and dark colors without pretreatment. Sublimation only works on polyester and requires white fabric. DTF transfers, on the other hand, work on almost any fabric, need no pretreatment, and handle full-color designs with ease. They're ideal for small to medium runs, personalized items, and hard-to-print materials like canvas bags or denim jackets.
Tips for Longer-Lasting DTF Prints
Want your prints to survive dozens of washes? Follow these practices.
- Wash inside out in cold water. Hot water and agitation break down the adhesive.
- Avoid fabric softener and bleach. They leave residue that weakens the bond.
- Tumble dry low or hang dry. High heat causes cracking.
- Iron on reverse side only. Never iron directly on the print.
- Test wash a sample. Before selling, wash a sample garment 5-10 times to ensure durability.
Frequently Asked Questions
Can I use DTF transfers on 100% polyester?
Yes, DTF works on polyester, but you need to lower the application temperature to around 300°F (150°C) to avoid scorching or dye migration. Use a lower temperature and slightly longer press time, and always test on a scrap piece first.
How long do DTF transfers last?
With proper application and care, DTF prints can last 50+ washes. The key is correct curing and pressing, plus gentle washing. They may outlast the garment itself if done right.
Do I need a special printer for DTF?
You can convert some inkjet printers, but dedicated DTF printers with white ink channels and RIP software are recommended. They ensure proper ink laydown and color accuracy.
Can I layer DTF transfers?
Yes, you can layer multiple transfers, but press each one separately. Wait for the first to cool before applying the next. Avoid overlapping too much, as it can create a thick, stiff area.
What's the best way to store unused DTF transfers?
Keep them in a cool, dry place, away from direct sunlight. Place them between sheets of parchment paper or in a dust-free container. They can last for months if stored properly.